
How to Assemble Your Stretcher Frame
How to Assemble Your Stretcher Frame
The following videos show how to assemble your new Upper Canada stretcher frame. The first looks at the assembly of a small frame without any braces and the second video shows how to assemble a larger one with braces. Step-by-step instructions are also provided below.
Download our instruction sheet here (2 pages, pdf format)
Assembling Your Stretcher Frame Step-by-Step
All stretcher frames from Upper Canada Stretchers are shipped disassembled in a compact, well-protected carton package. For a typical stretcher frame, the parts include bars, braces, bolts for connecting any cross-braces, and keys.

1. Clear a flat surface on the floor or table large enough to assemble the size of frame you are working with. Lay out the stretcher bars in the correct configuration (ie: same-sized bars parallel to each other).


2. Use a rubber mallet to tap the friction joints together. If you do not have a mallet, use a block of wood to protect the edge of the stretcher bar as you tap with a regular hammer.
Hold down one side of the joint while tapping the other side into place.

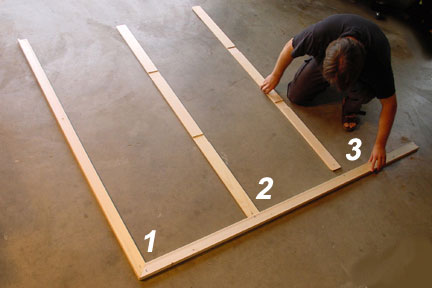
3. Two braces are then inserted at joints 2 and 3.

Close-up showing tenon of brace being inserted in the mortice on the bar.

4. The remaining braces are then put in place (joints 4 to 9).

5. Intersecting braces are machined with “dado” joints to provide a square & flush fit when nested together.

6. After all braces are inserted in the frame, install the third and fourth bars.

7. The third bar is assembled (joint 10, 11, 12) followed by the fourth bar (joints 13, 14, 15 and 16).
Using the mallet, tap all the joints so that they fit tightly together and are perfectly alligned at the corners.

8. Check that the frame is square by measuring the diagonals of the frame, which should be equal to within 1/8” of an inch. Also check the height and width of the frame and make any fine adjustments by tapping the bars with a mallet.
The dado joints where the braces intersect can now be fastened together with the screws provided.

The frame is now ready for stretching the canvas.
A note about keys….
The wedge shaped keys that are provided with every frame should only be inserted in the bar and brace slots AFTER THE CANVAS IS STRETCHED.
Two keys are inserted in every bar/bar joint and one key per bar/brace joint.